Category: About Me

The Labor and Delivery of Gabriel – a home induction and ICP story

The Labor and Delivery of Gabriel – a home induction and ICP story

My labor with Gabriel begins early on the morning of August 16th at around 6:30 am when I drank 2 oz of Castor Oil. From there, Kyle, my mom and I headed to the birth center and met with the midwife. My labor had not began as I was not having any contractions. When we got to the birth center, the midwife was late to meet us. As we waited, we walked around the birth center to see if walking would help labor begin.

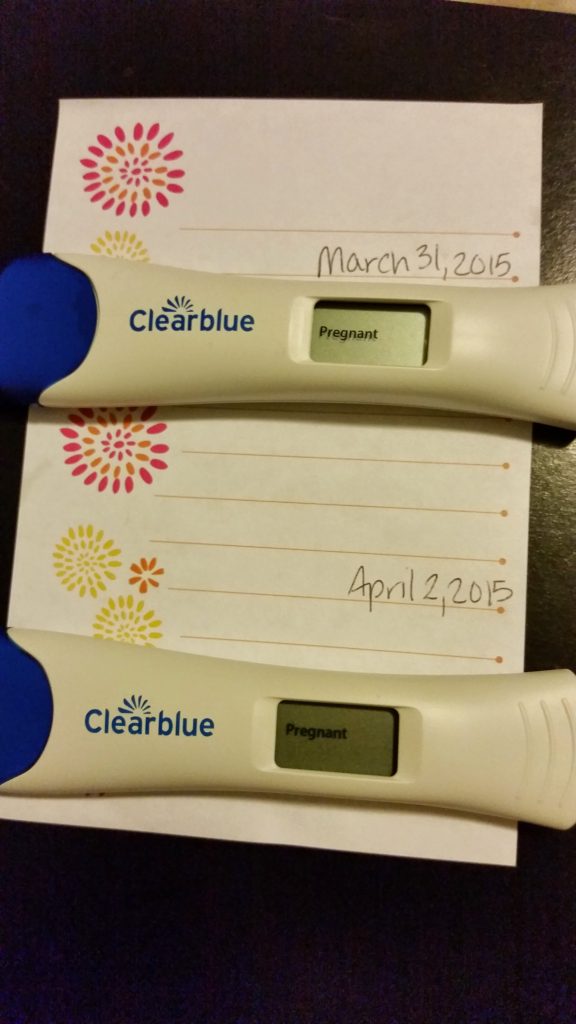
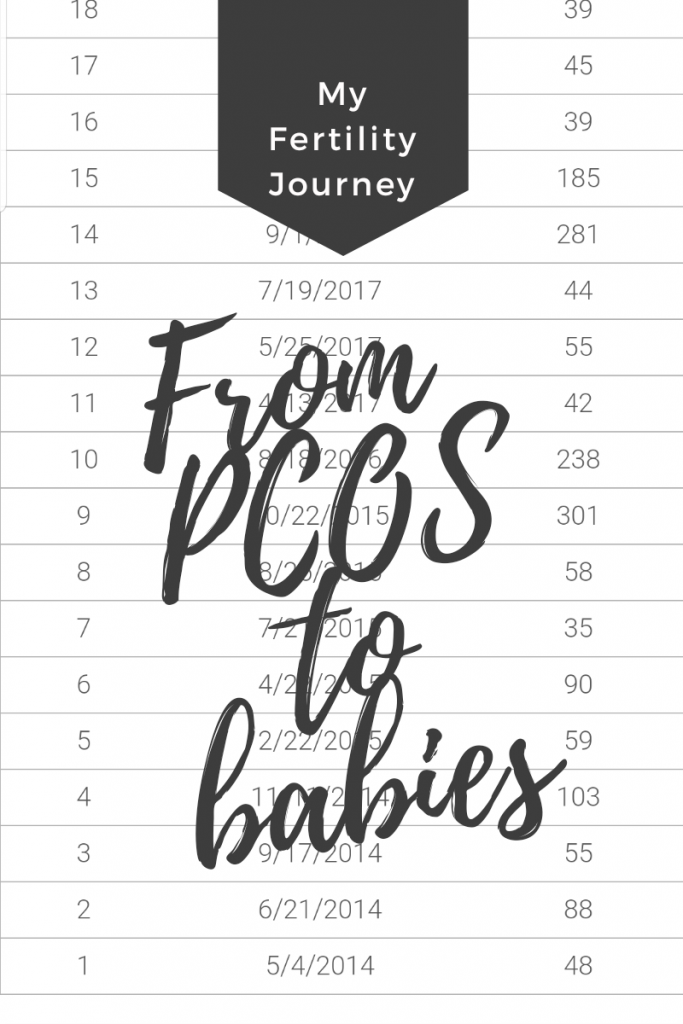
Check out the beginning of this story of how I got pregnant on my last blog post.

When the midwife met us, we had my membranes stripped and headed to an acupuncturist to try acupuncture to begin labor as well. Our appointment wasn’t for a couple of hours, so we had planned to stop and eat lunch but ended up walking around Kohls because the place we were going to eat was closed.

Acupuncture to Induce Labor

At the acupuncturist, he put a few needles in me and begin to stimulate my uterus with electrotherapy, it was now around 1 or 130 in the afternoon. With the castor oil and acupuncture, I began to have horrible stomach cramps and (TMI) diarrhea.

No one had told me that this is what the Castor oil and acupuncture do to get labor going. That I was going to hurt from this as much as the labor itself and get hemorrhoids from it. We left there and had to stop along the way so I could get to a restroom.

We headed to a mall to walk the rest of the afternoon to continue to stimulate labor until my chiropractor appointment.

***
Let’s flashback a week or two. I had been itching incessantly for weeks, well over 7 weeks at this point. I was told it was likely PUPPS but the itching had increased and then had begun to manifest itself in my hands and feet, as opposed to all over my body where it had been.

My midwife finally thought to test me for ICP or cholestasis of pregnancy. [Find out more about ICP here] Unfortunately, the tests for this usually take 5 days to come back. When I got the call from her, my heart dropped. I was scared, discouraged and at this point 41 weeks pregnant with no signs of labor. I went in for monitoring at 41 weeks and 5 days to see how the baby was doing. I sat on the monitor with my mom for well over an hour and a half, during which there was one really long deceleration of his heart. When the midwife saw that on the chart, she immediately sent me to the hospital for longer monitoring.

monitoring the baby

They monitored him for the rest of the day and there were no more decelerations but they wanted to induce me right then and there. I refused and reluctantly they sent me on my way with an appointment for induced just two days from then.. the day I turned 42 weeks.
***

Kyle and I walked, headed to the chiropractor, and then back to the mall to continue walking. We ate in the food court then carried on our march. I was determined to start labor and avoid the hospital at all costs. Contractions had started coming around 2:45 pm but were very irregular.

Finally, around 10:30 pm, my labor seemed to be full fledge. Contractions were 2 to 3 minutes apart and running together or coupling. I called my midwife and headed to the birth center to have her check me and hopefully get the baby out sooner rather than later that night. I was excited, hopeful, and ready to get this baby out.

In my head, I had this idea that birth would be beautiful. It would be painful, but I would have this great support team telling me how to deal with the pain. They would be there to encourage me and show me different things, and then in the wee hours of the morning, I would push this beautiful baby out and all the pain and heartache would be worth it!

I walked a bit around the birth center, but for the majority, I was in a very hot bath because the pain was very intense and the contractions were on top of each other. My birth team, rather than sit and talk to me slept in various locations around the building. The midwife and nurse came in and out of the room to check on my labor or force Raspberry Leaf Tea down my throat.

All the things that I had dreamed this birth would look like, nothing was unfolding as I thought. I felt alone and discouraged. I felt irritated at the surprise of the nurse that I was never told was going to be there. I felt nothing but negative things and pain.

The midwife checked me several times, and thankfully I was progressing. At around 6 or 7 am the next morning, she checked me and I was at a 7 cm dilation. She began to talk to me about transferring to a hospital because she wanted me to get an epidural and rest. This was the last thing I wanted. Yes, I wanted pain relief, but I did not want it from a hospital. My mom and Kyle because to discuss with her and were told that she thought it medically necessary.

I started to act out on my pain a bit more like a toddler hoping for attention; hoping for someone to support me and encourage me like I thought they were there to do. To no avail, I was a lost cause in their eyes.

Finally, after feeling like no one could help me, I agreed to transfer. Discouraged and angry, hurt and betrayed, the midwife gave me a shot of nobane (5 ml) to get me to the hospital and help with the pain. I rode with my mom, while Kyle rode with the midwife. I was too angry and hurt to ride with either of them. My poor mother later explained how terrifying it was for her to drive me because of the rush hour traffic and what if I started pushing on the way.

Overall the drive was calmer than the last two hours seemed to be. Music played and I sat in silence trying to not think about any of it. By the time I made it to the hospital, I had dilated another cm. I was encouraged by that but still irritated by the lack of support and ending up at the hospital. I became bitchy and angry. With getting to the room, I demanded the epidural saying, “Well, we came here for an epidural, where is it?”

My epidural was in and I was in the bed resting by 9:30 am. The morning went by in a blur because of my sleeping state, the haze of the drugs, and my lack of sleep for the past several weeks. By noon, the nurse checked me again, and I was still only an 8. The dr decided to break my water to see if that pushed me to the end. He left and I rested more with nothing else to do. My legs were massively swollen and I was very uncomfortable, but with the epidural, there was no pain.

The nurse checked me again at 3 pm and said I was fully dilated. She asked if I wanted to try pushing, and I agreed excited and thinking this would be over in just a few more minutes. They held my legs and I began pushing, but my contractions were several minutes apart. I would push with contractions and then wait. Nothing seemed to be happening. After 45 minutes of this, they called the dr and we tried a different position. By the time the dr got there 30 minutes later, he checked and the baby wasn’t stuck so I continued to push. He was in and out of the room while I pushed. Finally, around 5 pm, the room began to buzz with excitement as Gabriel began to emerge!

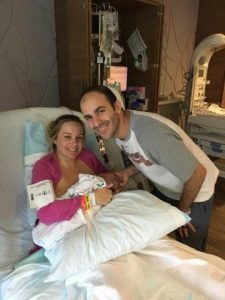
He was born at 5:08 pm, 7lbs 7oz and 21 inches long. After a long, grueling and disheartening birth, Gabriel joined the world. I was relieved, exhausted and done.

It took me months to process this birth. I was sad, depressed and angry at how everything had turned out. I asked God why and what I had done wrong. I investigated my liver issue that didn’t resolve after birth as it should and wondered what was wrong with my body that I didn’t go into labor on my own. Was it stress? Was it a lack of sleep? Was it the ICP? Why and where had it all gone wrong?

I still don’t have answers to many of those questions, but I have a few answers from God on some things. He redeemed this story through Kaius’ birth. He redeemed all the abandonment and pain that I experienced with Gabriel’s birth story. One main thing God told me through it was that I had this plan in my head of how things were going to go, and I wanted it to go a certain way, but I hadn’t consulted God in any of it. I hadn’t asked God to help me. It was all going to be in my own strength. All I needed to do was endure, and it would be beautiful.

But birth is a gift from God. A gift that we can only endure by God’s precious hand and by His strength. We can try all we want to be strong but without God, we can do nothing.

Stay tuned for Kaius’ birth next!

My journey to Motherhood Pt 1

My journey to Motherhood Pt 1

Let’s talk about how I became a mother to two boys and another baby on the way. My fertility journey from PCOS to two boys and another baby on the way. I might have to break this story up into several posts because it spans my lifetime. However, I know a lot of people can relate to having difficulties getting pregnant so I wanted to share my journey. Let’s start with 5 years ago, in 2014.

The Beginning

I had been on birth control for a couple of years but knew it would probably be difficult to get pregnant when my husband and I were ready to have kids. I knew this because my periods before I got on birth control, were 50 to 75 days apart. Sometimes they were even 80 days apart sometimes less, but never regular.

When my husband of several years and I were ready to start trying, I got off birth control. At first, it seemed hopeful because things seem to start off on a good foot with my first cycle only being 48 days long. But the wait then began to elongate. ..

I got off birth control in May, and by October nothing had happened, and I had only had two cycles. I began to look for an answer to what I figured would be a diagnosis of PCOS.

PCOS is Polycystic ovary syndrome. Basically, it means there are cysts on my ovaries that interfere with fertility. I began to track my periods and track all of the signs of fertility.

What was my body and its fertility doing?

As time ticked away, I began to learn a lot about fertility and my body. I started charting and tracking all my fertility signs. I began learning that my body didn’t have a problem after I ovulated except for a low progesterone level. In addition to that, my main and most glaring problem was that it took forever for me to ovulate. I would have a period, then 40+ days would go by before my body even thought about ovulating. Then I would ovulate, and 13 to 14 days later I would have my period.

This made it difficult getting pregnant because it was so long between ovulations. For other people, they can try once a month. Mine was once every 2 to 3 months. Besides this, I was experiencing low cervical fluid levels and low progesterone levels after ovulation.

I was discouraged but not giving up because I knew that everything was in God’s hands. He is the ultimate authority to my fertility, and no matter what happened I would learn to trust him with this. If you are feeling discouraged, I wrote this blog post about some ways to deal with it.

What do I do?

The first thing I did after temping and learning more about my body was looking into natural remedies. I stumbled upon a herb called Vitex via a facebook group I was in. After learning about it, I began to dig dipper into vitex. I learned what it was, what it was thought to do, and possible side effects and how it might help me. In the research, I found that Vitex had similar properties to the prescription Clomid and I became hopeful this was the answer.

PCOS Cycle

Throughout this journey, my husband and I were seeking answers from God. Asking for His guidance, and trusting that in the right time all things would come together. Whether that be through natural remedies, or through a doctor’s help.

Here is a screenshot of my cycles from 2014 to present.

My Fertility Journey with Vitex

After getting vitex and adjusting the dosage to be what I thought was a good amount, I hit my first stumbling block. 4 days after ovulating, I got super dizzy. I ended up going to the ER. They gave me some medicine to help me with the dizziness and nauseous but didn’t have a specific reason for why I was dizzy. I knew, though, based on the fact that I had just started the vitex and ovulated, it must have been caused by the vitex dosage.

I laid on the couch for 4 days miserable and unable to go to work or stand because of the dizziness. Finally, the problems seem to subside and things returned to normal. After this, I adjusted the dosage down a bit and did not experience another dizzy spell. I hit another wall though.

My next cycle was 100 days long. With things not seeming to be getting better I finally decided it was time to see a doctor and figure out what they could do. I made my appointment and describe the symptoms I was experiencing.

She was very nice and ran some tests but almost immediately diagnosed me with PCOS. She prescribed Metformin to me and mentioned Clomid. After discussing both options with her, I decided to hold off on Clomid and see how the Metformin worked. I knew from my research of the Vitex that I couldn’t take Clomid and Vitex at the same time. In addition to that, She mentioned that I could only take Clomid for a couple of cycles because of possible cancer risks.

That scared me and I decided to wait and do more research on the Clomid. I thought it would be good to start with Metformin before jumping to something that drastic. I say drastic because of the limited use options and possible cancer risks.

Fertility and Adding in Metformin

I continued to take my vitamins, the vitex, but now I added in the Metformin. It was February/March. I had been off birth control since May of the previous year and had only a mere 5 cycles in that time period.

Metformin is a diabetic medicine that doctors will prescribe to people with PCOS as an off label use. People with PCOS are shown to be insulin resistant and medicine helps reduce the insulin levels in the blood, thereby assisting infertility issues that are caused by high insulin levels.

Finally, after just two weeks on Metformin, I got a positive pregnancy test. I was over the moon! Now all I had to do was get through the pregnancy and meet my new beautiful baby. Or so I thought…

Continue the journey with me next week in the next blog post…

PCOS cycles
5 Must Packs and 5 Things to leave behind for Vacation with Your Kids

5 Must Packs and 5 Things to leave behind for Vacation with Your Kids

Recently, my husband and I went on an all-inclusive trip to Cancun and we took our two children who are almost eight-months-old, and two years old. It was a wonderful time where we enjoyed the beach, the food, and relaxation. Here are the top ten must-packs from my packing list when you travel with kids.

The Top 5 Must Haves

1. Pepto Bismol for Kids and other Children’s medicines

One of the worst things that can happen to you, God forbid, when you are traveling is that your child gets sick in some way. They can come down with a cough, a fever, or a tummy ache that leads to other bathroom problems.

I won’t go into much detail here because I’m sure you can imagine what it is like to be at a meal and your child needing to go to the bathroom 3 times within that span because they aren’t feeling well. This happens because your child isn’t used to other foods or can get some other food borne illness.

I recommend packing the following medicines:

  • Medicine for their stomach like this Pepto Bismol for kids.
  • For fever like children’s acetaminophen.
  • Something for cough and mucus. We prefer to use Zarbees because of the natural elements but any cough and mucus deterrent will be great to have on hand, just in case.
  • thermometer
  • gas drops for your baby

A great idea before you go on a trip is to help build their immune support. You can do this with Elderberry and Briar Rose drops. Or, getting out in the sunshine and letting them play for at least 30 minutes a day. If you are like me though, you probably don’t get that much time for them to play outside so the supplements are great for immune boosting. In addition to those two things, you can boost immunity with probiotics and vitamin d drops.

I recommend packing and having all the above. There is nothing worse than being on vacation, your child getting sick, and you not having anything to give them. Trust me! Even though it takes up space and adds weight to your bags, it is better safe than sorry.

2. Sunscreen and lots of it!

Even if you are going somewhere cloudy or cold, you need lots of sunscreen for the outdoors. It is heartbreaking if your baby or child gets a sunburn and you could have prevented it.

I recommend packing any sunscreen that has the main ingredient as Zinc Oxide. This is my favorite one, Badger SPF 30 Baby Sunscreen Cream.

Though it is hard to apply because it is so thick, you can mix it with coconut oil to give it a little more give. It is a great natural sun blocker. It forms a barrier on the skin to help protect and block sun rays. Unlike another sunscreen that absorbs into the skin along with any toxic ingredients that are used to make it.

In case of a burn, it is great to have on hand some aloe vera and lotion. One of my favorite lotions is the Johnson & Johnson Creamy Baby Oil. It’s a two in one combo pack because you get mosquito protection along with it’s moisturizing benefits.

3. Stroller and a Puddle Jumper Life Vest

The stroller was great for pushing the kids around in the airport or at the resort. If you aren’t going to an all-inclusive, there are many places that strollers work for and don’t work for. If you think you will be out and sightseeing a lot, a stroller is great for back up. Even if you don’t use it, my motto is better to have it then not. No one wants to carry around a 20 lb baby all day.

Alternatively, if you won’t be in a place where you will be able to push a stroller, pack your baby carrier. We have the K’tan and the Lilli Baby. Both are excellent baby carriers for different situations. We used the K’tan for going to the beach since I knew it would get sandy and is easy to throw in the washer when we got home.

The Lilli Baby is an excellent carrier when you are going longer distances and need back support. I love that you can wear the baby 6 different ways depending on their mood and size.

If you are going anywhere with a pool or beach, don’t forget your child’s life vest for swimming. It takes up some space in your bag, but definitely worth it since it literally can save your child’s life. We use this one and love it. It’s safety checked by the coast guard and will help not only keep your child afloat but keep your child’s head above water too.

4. Entertainment and Toys

Pack a few toys for the car, for the airport, for the airplane, for the hotel room and whenever you have down time. It is pretty embarrassing trying to get your child to stop climbing on things because they are bored and you didn’t bring any distractions.

We packed a few cars, some stackable rings for the baby, a rattle, and a train book to help distract our sons in different situations. The stackable rings were the big hit for both of them!

Also, YouTube has a great premium service where you can download your child’s favorite shows and use them offline. We downloaded a few for the airplane, though, the airplane did have a great entertainment system that he largely ignored.

5. Snacks

I’m going to be doing a post on this soon but snacks as a mom are so important. Especially if you are a #boymom, like myself. My son is constantly asking for something to eat and is very picky. He prefers to eat fruit and that just isn’t something possible to bring places. So, recently I went to Wal Mart and got a variety of snacks to pack in the diaper bag for on the go.

Some that I recommend:

  • rice cakes
  • apple sauce squeezes
  • fruit snacks
  • granola or chewy bars
  • cereals
  • Mini Muffins
  • pretzels
  • teddy grahams

A few other things I was glad I packed for the beach were

  • two different sized beach or tote bags to carry the sunscreen, baby hats, and toys back and forth to dinner and the beach.
  • My own sunglasses, because how often are those forgotten in the car?
  • Stuff for me to do in downtime that doesn’t require internet or my phone, i.e. a drawing pad and good book.
  • My phone and charger to take pictures with.
  • Sippy Cup for the 2 year old. Great ones to take are the toss and go because if you lose them it isn’t a huge deal and they are mostly leak proof. I say mostly because if your child knows how to pull of the lid it’s going to spill everywhere, which happened to me a couple of times.

I wish I had packed more cute covers for wearing to the beach or around the resort. If I were to have brought another one, I would’ve bought this one:

Bonus – Underwear!

If your child is potty trained and gets sick, make sure you bring plenty of change of underwear. You don’t want to be washing dirty underwear in your sink trying to get some on the last few days for them to wear, so always bring extra!

You get the idea, now lets move on to things that I packed that I didn’t need.

5 Things to Leave Behind

The above five things are things we would’ve missed on our trip if we had not packed them. We used all of it and we were definitely glad to have it. Here are five things I packed that I could’ve left behind:

  1. Kid Sunglasses – Unless your kid is obsessed with wearing the sunglasses, they will hardly wear these. It is better to take a sun hat in hopes they keep that on.
  2. Too Many Toys – It’s great to bring toys but I would narrow it down to less than four. We took a whole backpack full for our son and they just played with two or three of them.
  3. Baby Powder and Water Shoes – These would’ve been great but they were forgotten at the bottom of the bag. We never got too sandy that we needed the baby powder and if we did they had wash off stations in varies locations.
  4. Too Many Shoes and shirts – We definitely overpacked on the shirts and clothes. I came back and half my clothes were untouched because I wore my swimsuit most of the time with a cover-up.
  5. Laptop and other Big Electronics – This is a vacation with your family. The last thing you want to do is be distracted. You are spending a lot of money, you might as well unplug and enjoy your time.

I looked at a few other packing lists on pinterest when I packed and made my list from that. I know that I was definitely glad to have the above and wish I had left a few of the things behind. Be prepared but have fun on your trip. You only live once, so might as well enjoy the ups and downs.

If you liked this blog and want to know more about me or my daily life check out my blog posts in the About me category or follow me on Instagram @sharrette.co or @sharretteillustrations.

You can also check out my pinterest for things I pinned before my trip here. I have a bunch of great kid boards where I pin things like what to teach my son, different craft or activites, and even just fun baby gear!

Xoxo!

Searching For Happy

Searching For Happy

Searching for Happy

We are all searching for something – More money, better career, better friends or family. We just are seeking happiness and each of us thinks there are things that we can achieve or receive to make us happy. I’ve been searching for that, too.

If we can just make this much money, then I’ll be happy. If I just do this, that will make me happy. One more thing, one more time.. this is it. It’s the answer.

I recently went on a roadtrip with my mom and my kids to see my grandmother. She was listening to this show on YouTube talking about heaven. Roberts Liardon, God’s Generals. In it, Roberts discusses his temporary visit to Heaven as an 8 year old boy. Side note: I’ve always been fascinated by these stories and near death experiences.

Anyway, he describes heaven as perfection. The couch makes you feel comfortable, regardless your position. Your house has everything you want in it. The grass is so green, golf courses pale in comparison. Just listening to him describe it put me in awe and I long to be there.

Where It Lead Me

As I’m relaxing tonight, I am praying asking God to show me something and to speak to me. I feel like he was speaking to me about this. I am exhausted and just thinking if I can just have time to relax, if my husband does this or my kids do that, then I’ll just be able to relax and be happy. Then it hit me, no, I won’t ever be satisfied with anything on earth.

Sure, I’ll enjoy life and be momentarily happy with things, people and money but then the longing and emptiness will hit me again and I’ll go searching for more. Jesus is what I am searching for and heaven. The perfect place that molds itself, according to Roberts, around my comfort. I need to be in His presence worshipping him. It is what I was made to do, what I long to do. I get so busy chasing after everything else, though, that I forget the one thing that will complete me.

The Way

So if you are like me, finding life meaningless and dissatisfying, know that the only satisfaction you will ever find is in Jesus.

What Keeps Me Busy and My Daily Routine

What Keeps Me Busy and My Daily Routine

The silence on my blog has been deafening. I have completely hit a brick wall with coming up with ideas for blog posts. I’m not going to lie. What will keep readers interested? What am I interested in writing? Apparently, lately, not much! I’ve been so busy and overall tired that it just seems more like a chore than something I will enjoy. So, it has definitely taken a back burner for me. I thought now was the perfect time to do a post about me and my daily routine. I want to connect with y’all and what better way than to give you a peek inside my day!

The Past Month

I’ve been so busy with my son lately. He has been quite the handful. Ever since January he has been having a hard time getting to sleep for naps. When he doesn’t nap, I don’t get as much time to do things that I want to or need to do, like writing for this blog. So that has been one thing that has me distracted lately.

In addition to that, by the end of the night, if I have been busy with my son all day, I end up just wanting to draw or needing to work on one of the jobs that I have. It gets tiring and I have a lot of spinning plates up in the air right now.

I definitely enjoy what I am doing but sometimes things don’t get the priority they need. Especially when I just feel like sleeping and not doing anything. (No, don’t worry I’m not depressed. Just hitting the third trimester hard.) Life just gets busy and overwhelming sometimes, you know?

My Jobs

I have several different jobs that I am working now. I really am enjoying all of them. My favorite is doing this blog and drawing stuff, but that is the least profitable. Other jobs that I work are as a social media manager, graphic designer, and stylist. I work as a contractor on all three of those jobs and love it!

I feel like I have created a great outlet for me professionally for all the things I want to do while being able to stay home with my son. As I said though, it is hard work to keep all the plates spinning especially when my son decides he doesn’t want to sleep.

A Day In the Life – My Daily Routine

What does a typical routine for the day look like for me?

I get up when my son does. He is my alarm clock. He wakes up anywhere from 7:30 am to 9 am. Some parents or moms feel like they should wake up before their children to start their day off right, I am definitely not one of those moms. We wake up and change his diaper then get him breakfast.

After the breakfast routine which can take an hour or so, depending on how he acts and how much he eats, we play some. He will play with his toys or watch a little bit of tv while playing. Then we start with a snack or lunch before we head to put him down for a nap. It doesn’t seem like a lot but it sure takes up my whole morning.

Side Note

I realized today alone I spent from 8 am to 10:45 am just feeding him and making him breakfast. He ate some cereal, then wanted a fruit cup, and still wasn’t full. So, I gave him some applesauce and made him some quick and easy muffins. It was quite the breakfast!

One little trick I’ve learned recently, that might help you if you have a bottomless pit like my son, is to grab the 87c muffin mixes at Walmart that you just add 1/2 a cup of milk to the mix. It is so easy to mix and throw in the oven. I get mini cupcake paper and the clean up is even easier. Great for grabbing on the go. 

As I mentioned, from January, his sleeping has not been in a routine. So, I have been working on getting him back in one by trying for naps at the same time every day. It has been getting better. If he naps, I will draw, work, or blog. He sleeps from 2 to 3 hours so I get a good deal done. If he doesn’t nap, some days I will fight him for a few hours trying to get him to sleep other days I will give up and just let him play or we will go out.

After he wakes from his nap, we will go out to see family or run some errands. Other days, we just play here around the house. There isn’t much time left before I start dinner. We have a nice family dinner and my husband takes over baby duty. He’ll get him ready for bed and down for the night. I will then clean some and head to do more work or drawing.

It is a nice balance of family life and work but some days can be exhausting when he doesn’t nap. Those days seem to be overwhelming with touch and attention that he needs. Though, I wouldn’t trade it for the world!

Goals for the coming Months

So as you can see, I’m busy busy busy. The problem with a routine and children is that their internal schedules are constantly changing with their growth. Being flexible and adapting the routine as you go has been key for me since having my son.

For this blog, I think prepping and planning the content out will help with that. In the coming months, I would like to post more than I have been or at least get slightly more consistent. Also, continue to grow my social media and other jobs I have going. Drawing is my favorite thing to do, so I obviously won’t be giving that up!

Time sure does fly by when you are busy.

You can see what my goals are for this year in my blog post from earlier about my bucket list for this year. What are some of your goals and what does your typical day look like? How do you prioritize things you want to do versus things you need to do?

xoxo!

How to Deal with Feeling Discouraged

How to Deal with Feeling Discouraged

Lately, I have been feeling really discouraged. I see everyone else’s highlight reel and I just feel like I’m failing at everything. It makes me want to quit and hide in bed. What do I do to kick these feeling? While I am still working on it, this is a list of 11 ways of how to deal with feeling discouraged that have helped me get through some of it.

11 Ways of How To Deal

1. Take a break

Everyone needs a break. The more time you invest in something the less clearly you will be able to see it. You are too close. Step back. Take a breather. Get a new perspective.

Maybe you have spread yourself too thin. This is me. With being spread too thin, it can make you feel like you aren’t getting anywhere with anything. So, evaluate everything you are working on and let go of things that aren’t a true priority.

Ask yourself:

  • Why did I start this?
  • Is it important to my long-term goals?
  • Am I doing it well?
  • Do I enjoy it?

Just make sure that you don’t overwhelm yourself with too much. You can do it, just not everything!

2. After taking a break, start an easy piece or job.

Whatever you are trying to do, just start something small and easy to get back into it. Write a quick post, if you are blogging. Make it short and simple. If it is an art piece, set a timer and do a quick 10 minutes sketch or even only 5 minutes.

It is amazing what you can accomplish if you set a timer.

Another example would be making a quick batch of muffins. You can get the packets from Wal-Mart that you just add milk to. Super easy and quick to prepare and pop in the oven.

The key to this one is just doing something that you can see the results of quickly.

3. Practice something new

Running into burn out over a specific thing? Throw a twist in. If it is art related where you do mostly watercolor, try a new medium.  If it is work-related, are there new projects that you can take on to mix things up a bit?

Is there something new you have been wanting to learn but haven’t taken the plunge yet? Look into it. There are a lot of free or close to free places you can learn new things through.

Here are a couple resources to check out:

  • the local library
  • your community college
  • youtube or google search it

4. Redo an old piece

One thing that is really inspiring is to see how far you have come. Can you look back at an older piece you created or an older anything and see progress? I love Instagram for this reason! Looking back at my older posts then comparing them to newer ones gives me drive.

Wow! Look how far I’ve come. Nothing like pushing you forward when you look back. It’s like climbing a mountain and you are almost to the top but feel like you can’t make it the rest of the way. You look back and realize that you have almost scaled the entire thing. Keep going! You can do it! 

5.Pray and refocus on God

One thing I find when I am feeling discouraged is that I haven’t been spending time with God like I should or used to. This completely changes my perspective on life and goals. It reminds me how temporary everything else. All the happiness and sadness, they are fleeting like the wind.

Hope in God is the only thing that makes anything in this life worth achieving. So, I open my bible. I pray.

Psalms 42:5 “Why, my soul, are you downcast? Why so disturbed within me? Put your hope in God, for I will yet praise him, my Savior and my God.”

If you have read Ecclesiastes and relate to it, you and I have a lot in common. I recently read the book again and just was reminded of what the point of this life is – enjoy your lot and follow God. Hard to do when you feel discouraged, but keep in mind that God gives us contentment.

Share with God your burden. He will more than gladly take it from you and give his which is easy and light.

6. Find someone to encourage you

When you just can’t get out of your own head and want to give up, you’ve tried motivating yourself, what is left? Friends and fellowship. Find your best friend; text them, call them, show up at their house. Hence, they are your best friend for a reason and they want to be there for you.

Let them know how you have been feeling. They can laugh with you and cry with you. As a result, they will help get you through till you are on to the next thing. Then when they go through something similar, you can be there for them.

7. Set a small goal and accomplish it.

This is a huge thing for me because I thrive on achievement. You can set small goals in any area of your life and just do them. Also, It can be something for the house like clean the kitchen. Put it down on a list, do it, then check it off. Visualizing the achievement will help you feel more accomplished.

Other small goals you could set for yourself are:

  • cleaning a certain room in the house,
  • posting to social media something you have been planning to post,
  • getting to work at a certain time,
  • creating a new art piece
  • washing the laundry
  • putting away clothes
  • cleaning clutter up
  • taking the trash out
  • cooking a meal
  • getting the oil changed
  • working out for a certain amount of time that day,
  • meditating or having quiet time.

There are a ton of different things that are quick, easy to do. It will make you feel so much better feeling productive!

8. Get Out

People feel more depressed in the winter. You know why? Because the sun doesn’t shine as much in the winter and you are lacking vitamin d. What can you do to combat this? Get out with friends. Spend some time laughing and soaking up the spring weather on a good day.

Go to the mall and window shop. Go to the zoo. Have a tea party at a local tea room. This is one of my favorite things to do. I do it probably only once a year, but I still love it!

Take your kids to the library or a local play area. Meet your best friend for coffee and chit chat about all that is going on in your life. Just commit to getting out and doing something! As a result, you will feel better and more engaged with the world around you. Being coped up at your house or between work and your house you can feel trapped. It helps to remind yourself you aren’t alone!

9. Make a mood board

Colors can impact your mood. Quotes can impact your mood. So, pull images that inspire you and make you feel happy. Something to push you toward your goals and dreams.

I have a whole Pinterest board called mi motos that I pin inspirational and motivating quotes onto. I have definitely gone there when I am feeling discouraged or depressed and read through them. Consequently, It really helps me feel encouraged.

Do NOT make a mood board of sad and depressing images and quotes. Every time you look at it, it will just increase your current mood. Because your goal is to alter your mood. Take control and direct it toward how you want to feel.

10. Make a dream board

This one kind of goes along with the last one. The main difference though is that this board is directly related to things you want to achieve or accomplish. Say you want to own a boutique someday, you could pin or post images of what you want the boutique to look like.

Furthermore, Other things to add to it would be the type of styles you want to have in your boutique. Colors that you want as a focal point. Other stuff like that. This applies to any goal you have. In addition, you could have a list of your goals broken down.

11. Just remember you aren’t everyone else. You are you and that’s good enough!

It is noteworthy to mention that one of the worst things about social media is, of course you have heard, you are comparing your behind the scenes to everyone’s highlight reel. It can make you feel like you aren’t good enough, or you aren’t doing enough. This is absolutely false.

No one has a perfect life. Everyone has good days bad days, days they accomplish more and days they accomplish less. Therefore, the one thing that sets the successful and happy apart from the unhappy are that they don’t give up.

Choose to be happy and chase your dreams. You will not regret it!

Just a reminder to myself

I am writing this post as a reminder to myself, mainly. I’ve been dealing with feeling unmotivated and depressed on and off for several months. In conclusion, I will achieve stuff and feel great then go through a phase where I am not achieving and I feel more unmotivated.

I just keep redirecting myself and refocusing. Hence, I go through a lot of these steps I recommended and don’t give up! I’m encouraging you to do the same with me. If you have more tips, please feel free to leave a comment or connect with me on social media.

Finally, do you want to start a blog and have an outlet for how you are feeling? Here are three things that helped me when I started this blog.

Thanks for reading along with my musings! I look forward to hearing from you!

Refinishing A Table with Marble Project Paper

Refinishing A Table with Marble Project Paper

The Inspiration to Refinish A Table, my table that is.

I just got finished refinishing a table that I use as my desk and for all my craft and art projects. I wanted to tell you about the process, how I came up with the idea, and how amazing it turned out! Plus, it is super affordable.

Have you ever been on Pinterest and drooled over all the fancy home and office decor? No? Not even the amazing craft rooms? I have and do all the time. One day, maybe when my children grow up, I plan to make myself an amazing craft and office room. I’ve even started a Pinterest board to save all of the great ideas for when that happens.

In the meantime, I’ve been working on my art and blog. Taking photos has been a learning process over the past year or so. Trying to get the right lighting and editing the photos so the lighting and color are correct is quite the process. One thing I learned quickly was the setting or background needed to be consistent for posting and white generally looked the best to me.

What I’ve been doing in the Meantime for my Photos

I bought poster board to place my art and put my flat lays together. It worked for awhile but I got tired of the pure white look. Plus, poster board gets damaged easily. I deviated from the white poster board with scrapbook paper that looks like wood boards. I really like that and plan to still use it but then I started taking more photos from afar and of my workspace. The table I use is counter-top height. It’s not that comfortable. However, it keeps the kids from messing with all my supplies and the stuff I keep on it. The only problem is that it was a dark marble top.

Before refinishing the table

It didn’t make for pretty pictures. I kept pinning and drooling over all the white desks. One day, I thought, I will get a white desk to take amazing photos!

Well, that day hasn’t come but while I was at JoAnn’s this week I ran across an amazing product! Are you ready for it?

DCWV Project Paper Marble

DCWV Marble Project Paper

It was exactly what I had been looking for. The photos showed that it could go on the wall or furniture. I knew I had to get! So, I got it thinking that it had a sticky residue on one side to adhere it with. That was the first mistake I made.

Getting Home & Refinishing A Table

I got home and cleared off my table to begin refinishing the table with the project paper. It seemed like it would be quick and easy, so I got it started. I looked over the project paper and was upset to find it didn’t have a sticky side. There were no instructions either. I was at a loss how I was supposed to apply, so to google, I went.

Google told me that you are supposed to modge podge it onto things and put a layer of modge podge over it. How frustrating! I was just at JoAnn’s and could’ve bought the modge podge while I was there had I known. I wasn’t about to wait or go back to the store. That wouldn’t stop me, though! Searching through my house, I found some spray adhesive I knew would work great.

Unfortunately, that ran out halfway through applying the second sheet. It was rough! I finally found another medium that acts like mod podge in my art supply. I was able to finish applying it. Holding the sheets and trying to apply it without air bubbles was difficult and I didn’t get the edges perfect.

After I finished applying the paper, I applied a coat of gloss to seal it down some. Here is the exact process I used:

  1. Buy project paper
  2. Learn I needed modge podge
  3. Get frustrated
  4. Find alternate spray adhesive and lodge podge in my house
  5. Apply spray adhesive to back of project paper
  6. Align with edges and one side of table
  7. Slowly lay down from one side to the other while smoothing out the best I could the air bubbles and wrinkles
  8. Run out of spray adhesive
  9. Find modge podge alternate
  10. Apple to other sheet for the second half of table
  11. Slowly lay down from one side to the other while smoothing out the best I could the air bubbles and wrinkles
  12. Move table outside, and apply gloss coating
  13. Let dry

It is paper so I have to use coasters if I have a drink. However, I am happy with the results. I can’t argue with how cheap it was and it makes a huge difference in the look and feel of the table. Plus, I can take all the amazing photos I want as seen in my previous blog post here.

Results

Here are some more photos of the end result:

What do you think? For $6 it isn’t bad, right? It has a line in the middle where the paper meets, but I’m totally okay with that. I’ll keep dreaming of my someday office craft room that has all the expensive stuff but in the meantime enjoy this amazing hack I found.

What is a hack you have found for something you have been dreaming about off Pinterest? I’d love to hear it. Share it with me on social media or comment below.

Decopodge your way to an Instagram Worthy desk

Xoxo


3 Things About Starting A Blog You Can Learn From Me

The Decision to Start A Blog

3 things i learned about starting a blog
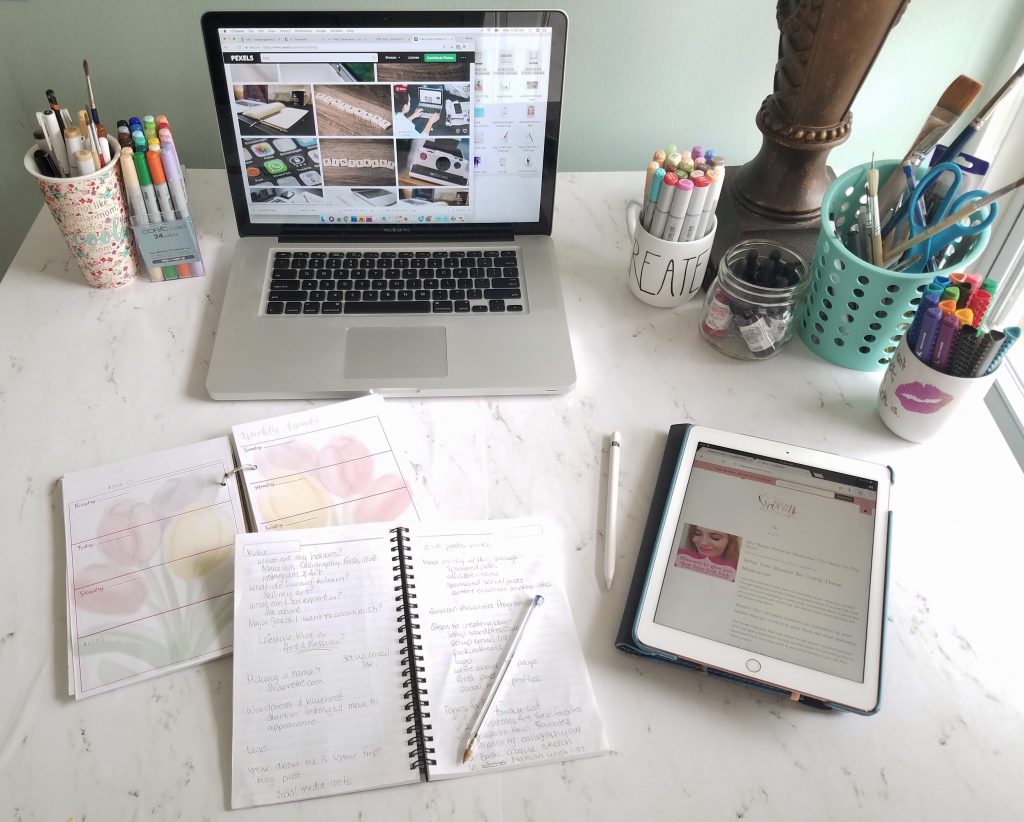
Blogging requires dedication, and I knew that going into it. I debated both sides of blogging before I started. Should I? Shouldn’t I? Let me make starting a blog easier for you by sharing my three main hesitations with starting a blog and how I overcame it.

I didn’t want to invest my time and money into starting a blog, only to trail off after getting into it. I knew I was going to have to go all in. So, the very first thing I did to prep myself was joining a blogging support group on facebook.

This has been one of the best things I could have done! I joined before I even really got started blogging. I followed along with other people’s questions and blogging and got some great tips to get me motivated and started. If you are even remotely thinking of starting a blog, that is the first thing I recommend.


Join a facebook support group!

What I learned from blogging

This is the one I am apart of:
Boss Girl Bloggers.  Laura is the admin and creator of the group. She is absolutely amazing. She promotes her blog (check it out here) which is packed full of blogging tips and tricks while also giving a lot of great advice and resources for you. The other members of the group are super helpful and supportive as well. Don’t be afraid to ask questions, get involved in the group and you will want to get your blog started right away!

Pin Everything Starting A Blog Related on Pinterest!

Another thing that has helped me get started on the right foot has been reading a lot of other blogs. Pinterest is a great resource for this. Have a question, Pinterest it!

I’ve been working on getting everything I have in sync and Pinterest has been my go-to for answers along with the support group on Facebook.

I have good momentum on this blog, and I don’t want to lose steam. I joined StumbleUpon, set up my social media accounts. Planned out my first bits of content. However, one of the struggles I have run into with my blog has been content. Topics are a dime a dozen. I don’t want to repeat content from other bloggers and I want my blog to be a resource for people. So, I am still working on building that.

Blog Content Topics

I have read over and over that one of the most important things I need to do to make my blog successful is good content. My first blog post was an easy about me and why I wanted to get blogging. Check it out here. However, what do I write about next? This has been another thing that Pinterest has helped with. There are a lot of pins about blog topics.

So, don’t be afraid to research, read, and learn as you go.

Research Before You Purchase

Finally, the third thing you can learn from my journey in starting a blog is that everything doesn’t have to cost you an arm and a leg to get it going. Marketing, as I learned from my master’s program, is a huge part of building a great business. Generally, you want to spend 5-10% of your budget on marketing. But, what if you don’t have a budget so you don’t have a percent to go toward it? Promoting your blog can come in small increments, $5 here and there. Also, don’t be afraid to use free resources like social media. I am still figuring out the promoting and increasing my blog traffic. Reach out to family and friends to become readers of your blog. They will want to support and encourage it during the process.

Another one of my hesitations with starting a blog was the startup cost of the site. WordPress.com, which everyone recommends WordPress, costs $30 month for the business account with all the features I wanted. That is over $300 a year! Yikes!

This is where Boss Girl Bloggers came in handy. I learned about self-hosting and SiteGround through the group. You sign up and install the WordPress plugin on SiteGround. If you already have a blog going, no worries, they do site transfers for free. The only thing you might lose is the photos. The benefits are huge though! It saved me over $25 a month for at least the first year! Plus, I am not restricted by the rules of wordpress.com that came along with having my site through them. I can monetize and post how I like when I like.

It definitely made my decision with starting the blog easier.

What tips helped you the most when you started something?

Comment below or on my social media channels: Instagram, Facebook, Twitter, or Pinterest. I would love to hear some and follow along with your on your journey!

Bucket List – My Top Five for 2018

Bucket List – My Top Five for 2018

My Bucket List/Goals for the Coming Year

2017 was an exciting year for me. My Etsy shop picked up traction, my Instagram accounts have grown dramatically, and I went through a lot of personal growth both artistically and personally. As I look forward to 2018, I want to make a plan to grow this year but not be unrealistic. So I am making a top 5 bucket list of what I want to achieve.

Top 5 List

1. I’d like to hit 2500 followers on both my @dreamisawish_designs and @sharretteillustrations Instagram accounts.

Followers aren’t everything because I’ve noticed that the more followers I have, the less engagement I get. However, there would be a lot I could do in connection with this blog. That’s why I am putting that on my 2018 bucket list.

2. I’d like to see consistent growth in both my calligraphy and fashion illustrations skills.

At the end of the year, I’m going to redo one of the pieces I’ve done this month to compare the style and development. There is nothing like rewarding yourself for small things, and I feel like this would be a pleasant reward for the end of the year.

3. I’d like to be consistently posting to this blog.

My goal is to have at least 2 to 3 posts a week. It doesn’t seem like a lot, however, I have started blogs before and I quickly lose traction. I feel like with this blog I have a more focused topic to write about. That should help keep me motivated and writing consistently.

4. I want to overhaul my Etsy store.(You can see my shop here) Revamp some of my listings and add graphic design and fashion illustrations to the mix.

My Etsy store consists of calligraphy pieces and pieces targeted toward marketing and Senegence products. I want to, in essence, grow my line by diversifying. This isn’t challenging. The challenge would be to make the products marketable. Setting prices and getting people to buy isn’t as easy as listing and hoping someone stumbles upon it.

5. I want to put profit as my number five. However, instead, I feel like I should put something along the lines of generating meaningful content instead.

Everyone wants to profit from their work, and some do. I’d like to be one of those people. To do that, though, I want people to genuinely enjoy the content I’m producing; for the art to be pleasant and relevant and the content of the blog to be impactful instead of just words on the page.

So, that’s what my number five is: meaningful content.

pexels-photo-317409.jpeg

In Conclusion

This is my top 5 bucket list for 2018. I hope to look back at this throughout the year and see development as I go. I’d love to hear what your bucket list is for 2018. Share it with me on social media or in the comment section.